

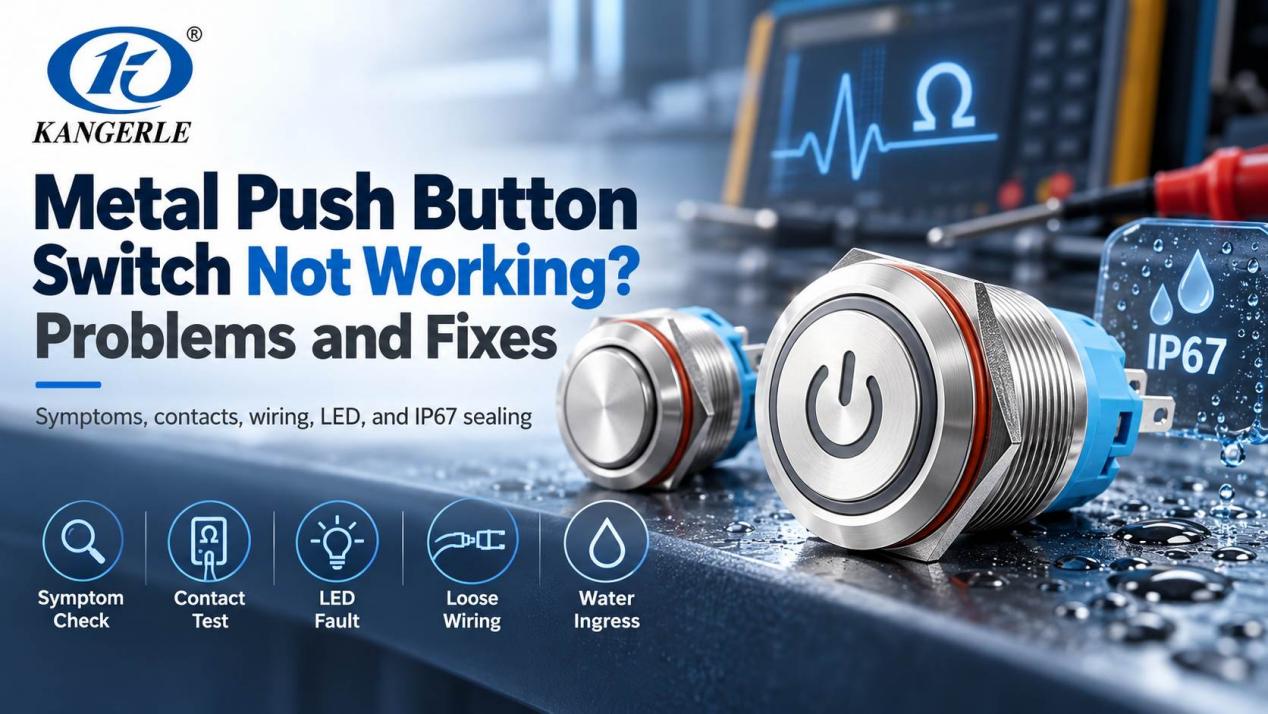
Metal Push Button Switch Not Working Problems and Fixes
A push produces a clean click, yet the switch does nothing. That familiar scene does not identify the failed part. A loose crimp can cause it. So can a missing control supply, an open contact, a relay, or an input card. An illuminated button can be more confusing: the lamp and command often travel on different wires.
Begin at the cap and follow the command toward the controller. Check travel, contact change, each wire, and finally the receiving input. This order also suits a button that works now and then, sticks, runs hot, stays dark, or sits in a wet panel.
Record the Symptom Before Moving Any Wires
Write the symptom before touching the panel. No response at all? Response after three presses? LED dark but command present? Does the cap return, and does cable movement change the result? Those answers choose the first meter point.
Open-panel work starts with the equipment’s approved isolation and test procedure. Continuity belongs on a dead contact circuit. Any live reading belongs to trained personnel with the specified meter and protective method.
Use the Symptom to Choose the First Test
Match the operator’s report to the table before reaching for a tool.
|
Symptom |
First Check |
Likely Area |
|---|---|---|
|
No response at all |
Supply and continuity across the intended contacts |
Power, wiring, contacts, controller input |
|
Works when cable moves |
Terminal tightness and conductor strain |
Loose crimp, broken wire, poor solder joint |
|
Button stays down |
Travel with panel nut slightly loosened |
Misalignment, contamination, damaged return mechanism |
|
LED dark, command works |
LED voltage and polarity at lamp terminals |
Lamp wiring, wrong LED voltage, failed LED |
|
LED works, command fails |
Contact continuity while pressed |
Wrong terminals, worn contacts, downstream circuit |
|
Hot terminal or discoloration |
Load, resistance, and connection quality |
Overload, loose terminal, contact damage |
Check Power and the Receiving Circuit First
At the supply side, answer five items: fuse good, control voltage present, emergency chain closed, interlocks satisfied, controller healthy? Try another input on the same supply. Several dead inputs send the search upstream.
Watch the input indication or measure its voltage while the button is pressed. An input that changes clears the field device and its cable for that test. Continue at the logic, relay, contactor, timer, and machine permissives before removing the button.
Confirm the Correct Contacts and Switch Function
Confirm the Correct Contacts and Switch Function
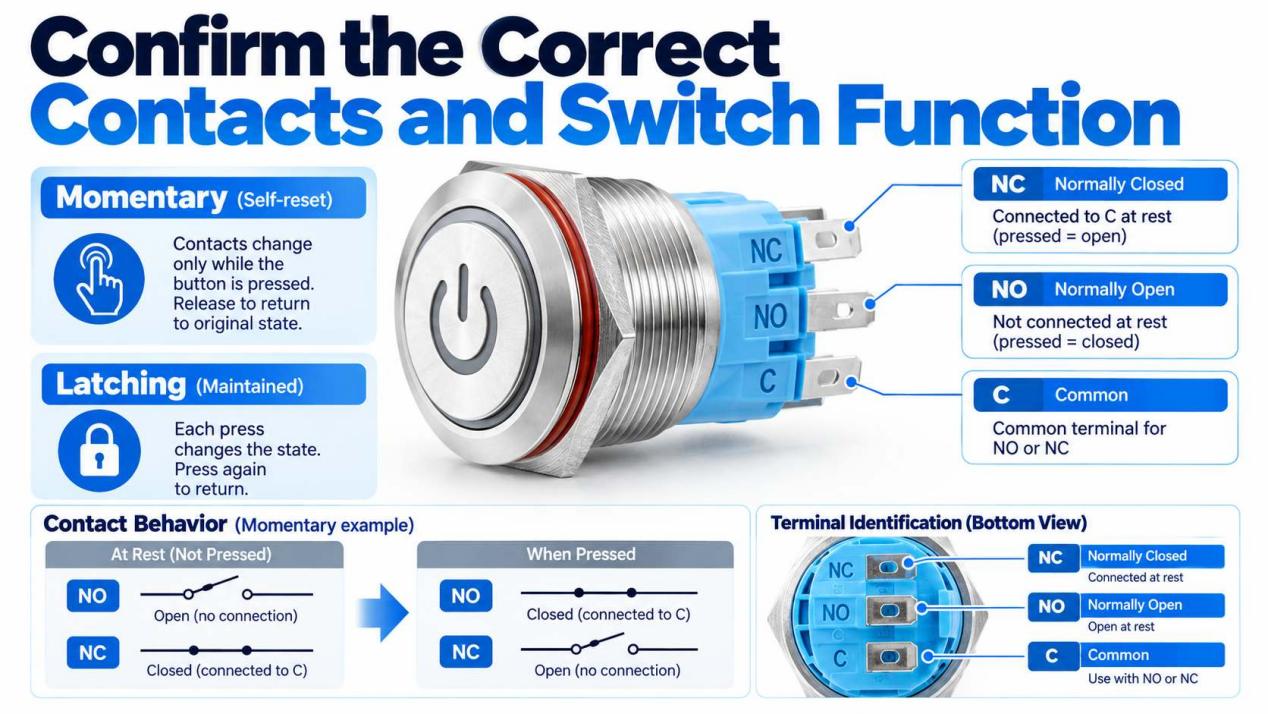
Momentary or latching? Hold the first type down and its contact changes only for the press. The second stays in its new state until another press. A replacement with the wrong action may be perfectly healthy, although the machine response looks faulty.
Page check for the KANGERLE 22 mm example: momentary and latching are both listed. Contact-block force is 3.5 N for 1NO and 4.5 N for 2NO. Put the ordered action and contact count on the fault sheet.
Power off. Use the drawing or terminal marks to find the intended pair. At rest: open. While pressed: close with a low reading. Do not copy terminal position or wire color from another switch; nearby LED pins serve another circuit.
Find Loose Wires, Poor Crimps, and Solder Faults
Pull each conductor lightly. Look inside the crimp barrel for missed strands and check that the plug is home. Then move the harness a little while watching the meter. Panel doors reveal weak joints that remain closed when the cable lies still.
Meter path: button terminal to the next fixed point. Does the value jump when the harness bends? Repair that section with the specified contact and tool. Twisted wire or added solder on an unsuitable crimp should not return to service.
Test Contact Continuity and Resistance
Remove one lead from the chosen contact; otherwise a parallel route can give a false reading. Take three readings: released, fully down, and during a slow return. A sound contact changes cleanly. Delay, chatter, or a high value calls for a closer look at travel, dirt, wear, and terminal condition.
The 22C data gives a useful reference: contact resistance is capped at 100 mΩ and insulation resistance is listed at 1000 MΩ or more. A continuity buzzer is fine for locating an open path. Incoming inspection needs a written current, meter, fixture, and pass limit.
Inspect a Button That Sticks or Does Not Return
First, press the center and then press close to each edge. Listen for any scraping sounds and check the speed at which the cover lifts up. If the action is not obstructed by the retaining nut, study the location of the hole, washer, gasket, and panel face.
Oil, chips, dried cleaner, and dust around the cap deserve attention. Remove them by the machine’s approved cleaning method. A waterproof claim is not permission to flood an assembled panel. A cracked, bent, gritty, or slow mechanism should be replaced once outside interference has been ruled out.
Separate an LED Fault From a Contact Fault
Treat contact and lamp as two circuits. Command works, LED dark: check lamp supply, LED terminals, rated voltage, and DC polarity. LED works, command absent: return to the contact pair and controller input.
Three LED supply groups appear on the KANGERLE product page: AC/DC 3–6 V, AC/DC 12–24 V, and AC 220 V. It also lists red, green, blue, yellow, white, orange, purple, red/green, and red/blue. Read the voltage mark or purchase record. Lamp color does not reveal its voltage.
Check Load, Heat, and Contact Wear
A button may pass commissioning and then suffer from the load. Motors, coils, lamps, and capacitive inputs bring inrush or arcing beyond the steady reading. Contact pitting raises resistance; a loose terminal adds more heat.
The 22C listing states 5 A at 110 V AC and a 1500 V AC withstand value. Neither figure is an inrush rating. Record whether the load is a motor, coil, lamp, or electronic input. In an indirect control circuit the button operates the relay or contactor coil, leaving the larger load out of its contact path.
Look for Water Entry at the Complete Panel
Look for Water Entry at the Complete Panel
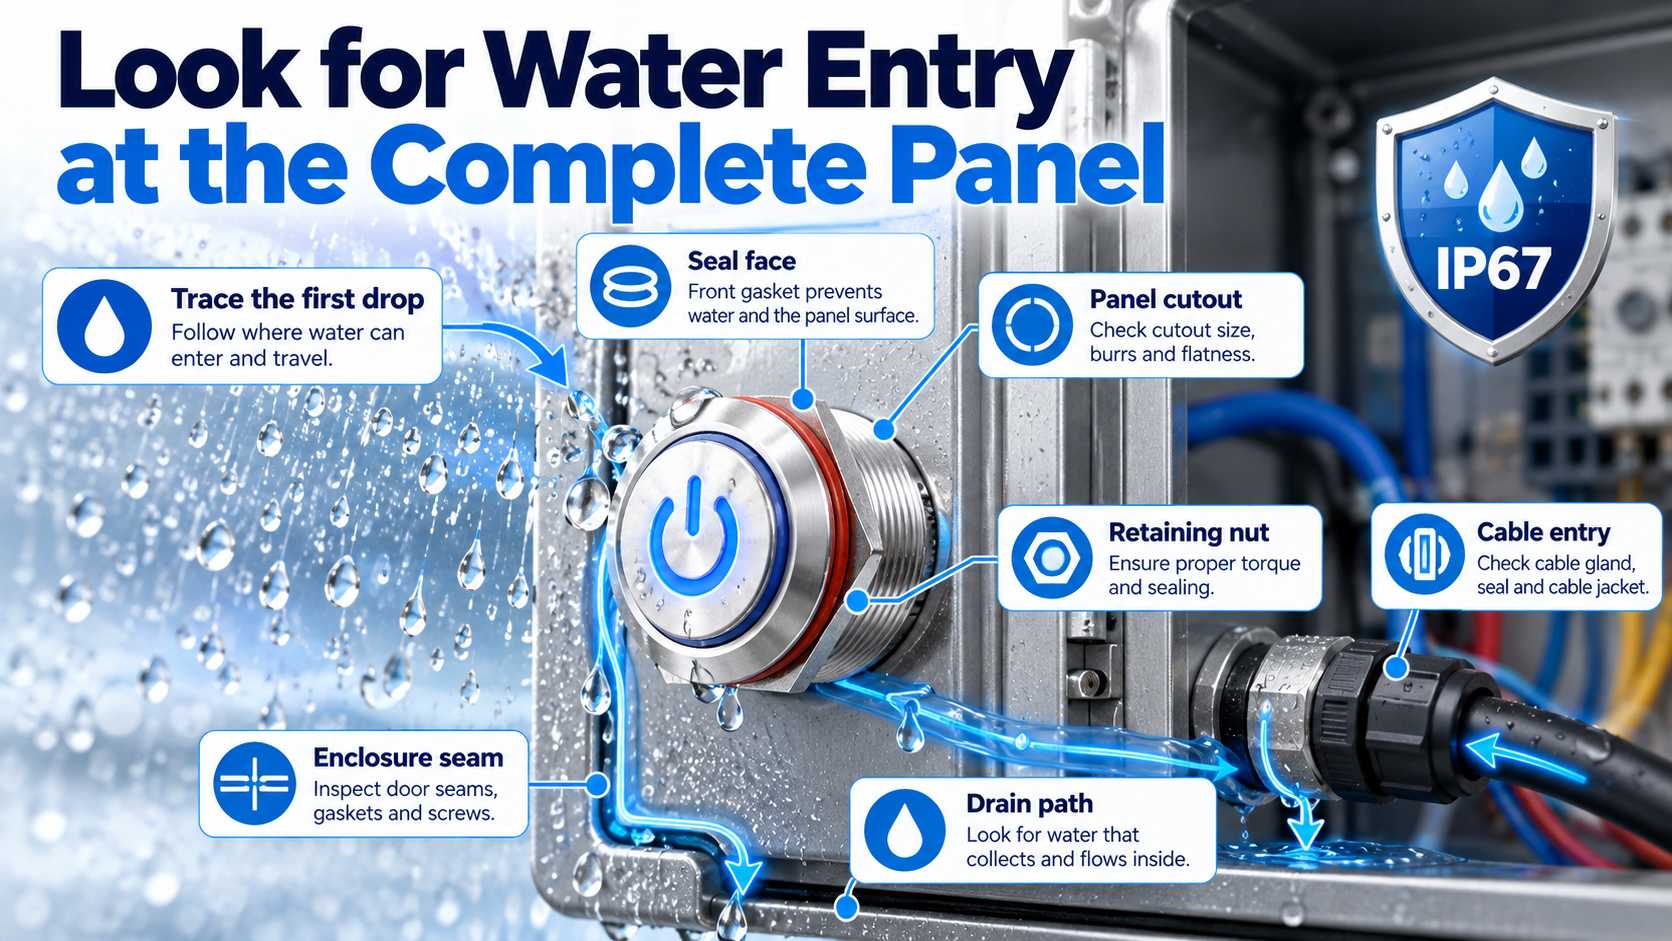
Where did the first drop appear? Trace it upward. Inspect the cutout and gasket, retaining nut, cable entry, enclosure seam, and any drain route. Water collected at the panel floor says little about its entry point.
The example carries an IP67 statement, based on the IP code in IEC 60529. Field protection also relies on a round cutout, a flat sealing face, an undamaged gasket, and a sealed cable route. Even a burr beneath the gasket can matter.
A Practical Multimeter Check
Run the meter work in one order and write down every reading:
• Photograph wires and terminal marks before disconnection.
• Isolate power and verify the dead circuit by the approved method.
• Lift one contact lead; read the intended pair at rest and pressed.
• Read each wire to the next terminal while lightly moving the harness.
• After reconnection, qualified staff check the receiving input during operation.
• Check LED supply and polarity apart from contact continuity.
Replace the unit if its contacts never change, the reading still jumps after sound wiring is proved, the cap fails to return, the body or seal is damaged, or a terminal bears heat marks. Tag the removed part with its lot and readings. A second failure can then be compared with real evidence.
Product Example: 22 mm Waterproof Momentary Metal Push Button
Product record: KANGERLE 22C series, 22 mm waterproof momentary metal push button switch with LED. This switch has a rated current of 5 A at 110 V AC and temperatures ranging from -20°C to 55°C. Operating force is 3.5 N for 1NO or 4.5 N for 2NO. Electrical entries are ≤100 mΩ contact resistance, ≥1000 MΩ insulation resistance, and 1500 V AC withstand voltage. Protection is IP67. LED supplies cover AC/DC 3–6 V, AC/DC 12–24 V, and AC 220 V, with nine color choices. Listed life is 30,000 electrical cycles and 2,000,000 mechanical cycles. The drawing and actual circuit remain the final ordering check.
KANGERLE as a Reliable Supplier
Zhejiang Kangerle Electronics Co., Ltd. emerges as a top player in the electronics field. It supplies metal push button switches and publishes application material in its solutions section. Source review should match contact action, LED voltage, drawing revision, ingress record, and life data to the approved sample.
For a replacement request, send panel hole, contact logic, load, LED supply, cable method, environment, and annual volume through the หน้าติดต่อ. Add the fault readings. They help separate component failure from wiring, mounting, overload, or a panel leak.
บทสรุป
There can be many reasons for one dead command. Follow a predetermined path: note down the symptom, safely isolate, identify action/contact pair, cable testing, isolation of the lamp circuit, input of the controller, and loading/ sealing. Change the button only if the readings lead you to change the button. Keep these readings for your next visit.
คำถามที่พบบ่อย
Four service questions finish the diagnosis.
Why Does the Button Click but the Machine Does Not Start?
The click proves that the cap moved; it says nothing about the electrical path. With power isolated, meter the intended contact pair. Under the site’s approved live-work method, check whether the controller input follows the press. Those two observations divide the fault among the button, cable, and downstream logic.
Why Doesn’t the LED Turn On Despite the Switch Working?
Lanterns usually provide their lamp with its own contacts. Measure voltage on them, check if it matches the AC/DC indication, and note polarity if it is a DC LED. A functioning contact will not illuminate a lantern with no power.
Does the IP67 Metal Push Button Continue Leaking inside the Enclosure?
Yes. Possible reasons may be the improper location of the button, pinched seal, non-flat surface, cable entry point, seam, or fastening element. Identify the place where the moisture appears first and perform corresponding enclosure test.
When Is a Metal Push Button Switch to Be Replaced?
Replace the switch if the right pair never varies, the display continues changing unpredictably despite cable repair, the cover will not go back on, the seal gets sliced or the terminal becomes overheated. Match the replacement with the operation mode, contact configuration, load, lamp supply, cutoff rating, and ingress protection.